Deploying an application on Heroku was a bit challenging. Although there are a lot of great posts and tutorials, I was facing issues at every step. But then, I was trying to do something different. I wanted to navigate through multiple HTML pages and gel the HTML, Python, and FLASK together on HEROKU. Well finally, it worked out all fine, and below are the details of my Twitter Sentiment Analysis application.
Project Overview:
First, let me tell you how this Heroku application actually works.
Step1: Twitter – Find Trends and Analyze Sentiments
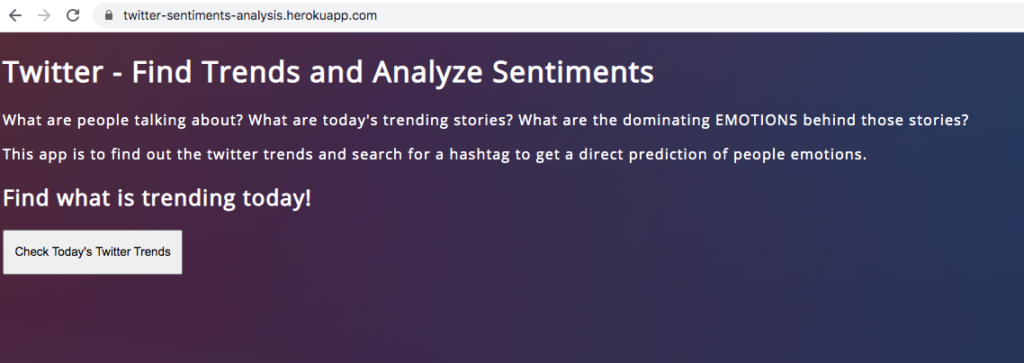
This is the home page for my application. There are descriptions and a clickable button. On clicking, it will navigate to a new page.
Step2: Twitter – Get Live Trends

Now, this page is a little complicated and have a few actions.
Display Top 10 Live Trending Hashtags
It will display Top10 Trending Tweets and the corresponding language. It is supposed to display the translated tweets. But there is some issues with Google Translator and at times, it is not working.
If you have not worked before on collecting tweets or if you have never used Tweepy, please go through my previous posts to get a better understanding.
- Collect Tweets on Corona from Twitter using Tweepy
- Explore Twitter Trends By Location using Python
- Streaming Tweets from Twitter using Tweepy and Text Analytics
- Sentiment Analysis using TextBlob – Exploring #Racism #AllLivesMatter in Twitter
- Text Analytics on #coronavirus trends in Twitter using Python
On this post, I will concentrate on running the app on Heroku.
Search for Tweets for a corresponding Hashtag
The idea is to select a trending hashtag and read about some corresponding tweets. So, there is an input text and a button. On filling the input text and on clicking the button, it will navigate to the next page.
Step3: Twitter – Get tweets for a Hashtag and Predicted Emotion
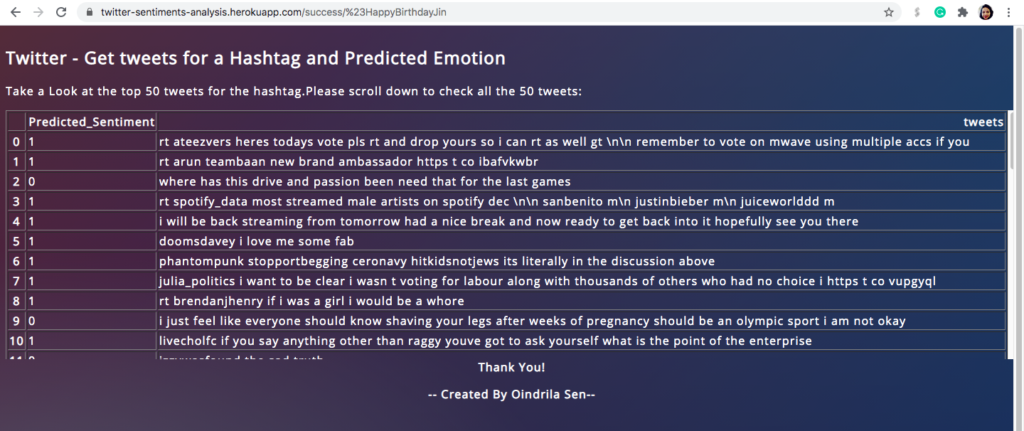
This is my final page and it will display top 50 tweets for a hashtag and the predicted sentiments behind those tweets.
So, that is my multi-page application, deployed on Heroku. Let’s get started with the deployment.
Project Execution:
To make this project work, we need some knowledge on below topics:
- HTML
- Python
- FLASK
- Heroku free account
Well, I worked on creating an app and running it on localhost. Please check how to Deploy Your First Machine Learning Model using Flask.
Now, let me start with the HTML pages. In this project, there are 3 HTML pages. We have to place these HTML pages inside a “templates” folder.
Home Page: Twitter – Find Trends and Analyze Sentiments
<!DOCTYPE html>
<html>
<head>
<meta charset="UTF-8">
<link type="text/css" rel="stylesheet" href="{{ url_for('static', filename='./style.css') }}">
</head>
<body>
<title>Twitter - Find Trends and Analyze Sentiments</title>
<h1>Twitter - Find Trends and Analyze Sentiments</h1>
<p> What are people talking about? What are today's trending stories? What are the dominating EMOTIONS behind those stories? </p>
<p><p> This app is to find out the twitter trends and search for a hashtag to get a direct prediction of people emotions.
<div>
 <h2>Find what is trending today!</h2>
</div>

<div class="container">
<form method="post">
<!---form action = "http://localhost:5000/" method = "post"-->
<button class="submit" style="height: 50px; width: 200px"  id="gtrends">Check Today's Twitter Trends</button>
</form>
</div>
</body>
</html>
</doctype>
Trends Page: Twitter – Get Live Trends
<!DOCTYPE html>
<html>
<head>
<meta charset="UTF-8">
<link type="text/css" rel="stylesheet" href="{{ url_for('static', filename='./style.css') }}">
</head>
<title>Twitter - Get Live Trends</title>
<h2>Twitter - Get Live Trends</h2>
<body>
<p>Take a Look at the top 10 trending tweets:</p>
{{ table|safe }}
<p>
<p>
<h3>Search tweets for a Hashtag: </h3>
<p>
<div class="container">
<form method="post" action="{{ url_for('get_data') }}">
<input type="text" id = "search" name="search" placeholder="Enter a hashtag here" required="required" />
<br>
<p><p>
<button class=submit style="height:50px;width:150px" id="gtweets">Get Tweets for a Hashtag</button></a></p>
</form>
<br>
<br>
</div>
</body>
</html>
</doctype>
Final Page: Twitter – Get tweets for a Hashtag and Predicted Emotion
<!DOCTYPE html>
<html>
<head>
<meta charset="UTF-8">
<link type="text/css" rel="stylesheet" href="{{ url_for('static', filename='./style.css') }}">
</head>
<title>Twitter - Get tweets for a Hashtag</title>
<div style="overflow-y: auto; float:left;">
<h2>Twitter - Get tweets for a Hashtag and Predicted Emotion</h2>

<p>Take a Look at the top 50 tweets for the hashtag.Please scroll down to check all the 50 tweets:</p>
<p>
<div style="height:350px; overflow-y: scroll; float:left;">
{{ table|safe }}
</div>
<p>
<br>
<p>
<br>
<p>
<!--h3>Positive Vs Negative Sentiment</h3-->
<br>
<!--img src="{{url_for('plot_png')}}"-->
<!--img src="/plot.png" align = "middle" -->
<br>
<p align = center><b>Thank You!</b></p>
<p align = center><b>-- Created By Oindrila Sen--</b></p>
</body>
</html>
</doctype>
If you notice the HTML pages, I have used a stylesheet to add a background, some color, and specify the fonts, etc. We need to put the style.css file inside a folder named “static“. So, here goes my style.css:
Style.css
@import url(https://fonts.googleapis.com/css?family=Open+Sans);
.btn { display: inline-block; *display: inline; *zoom: 1; padding: 4px 10px 4px; margin-bottom: 0; font-size: 13px; line-height: 18px; color: #333333; text-align: center;text-shadow: 0 1px 1px rgba(255, 255, 255, 0.75); vertical-align: middle; background-color: #f5f5f5; background-image: -moz-linear-gradient(top, #ffffff, #e6e6e6); background-image: -ms-linear-gradient(top, #ffffff, #e6e6e6); background-image: -webkit-gradient(linear, 0 0, 0 100%, from(#ffffff), to(#e6e6e6)); background-image: -webkit-linear-gradient(top, #ffffff, #e6e6e6); background-image: -o-linear-gradient(top, #ffffff, #e6e6e6); background-image: linear-gradient(top, #ffffff, #e6e6e6); background-repeat: repeat-x; filter: progid:dximagetransform.microsoft.gradient(startColorstr=#ffffff, endColorstr=#e6e6e6, GradientType=0); border-color: #e6e6e6 #e6e6e6 #e6e6e6; border-color: rgba(0, 0, 0, 0.1) rgba(0, 0, 0, 0.1) rgba(0, 0, 0, 0.25); border: 1px solid #e6e6e6; -webkit-border-radius: 4px; -moz-border-radius: 4px; border-radius: 4px; -webkit-box-shadow: inset 0 1px 0 rgba(255, 255, 255, 0.2), 0 1px 2px rgba(0, 0, 0, 0.05); -moz-box-shadow: inset 0 1px 0 rgba(255, 255, 255, 0.2), 0 1px 2px rgba(0, 0, 0, 0.05); box-shadow: inset 0 1px 0 rgba(255, 255, 255, 0.2), 0 1px 2px rgba(0, 0, 0, 0.05); cursor: pointer; *margin-left: .3em; }
.btn:hover, .btn:active, .btn.active, .btn.disabled, .btn[disabled] { background-color: #e6e6e6; }
.btn-large { padding: 9px 14px; font-size: 15px; line-height: normal; -webkit-border-radius: 5px; -moz-border-radius: 5px; border-radius: 5px; }
.btn:hover { color: #333333; text-decoration: none; background-color: #e6e6e6; background-position: 0 -15px; -webkit-transition: background-position 0.1s linear; -moz-transition: background-position 0.1s linear; -ms-transition: background-position 0.1s linear; -o-transition: background-position 0.1s linear; transition: background-position 0.1s linear; }
.btn-primary, .btn-primary:hover { text-shadow: 0 -1px 0 rgba(0, 0, 0, 0.25); color: #ffffff; }
.btn-primary.active { color: rgba(255, 255, 255, 0.75); }
.btn-primary { background-color: #4a77d4; background-image: -moz-linear-gradient(top, #6eb6de, #4a77d4); background-image: -ms-linear-gradient(top, #6eb6de, #4a77d4); background-image: -webkit-gradient(linear, 0 0, 0 100%, from(#6eb6de), to(#4a77d4)); background-image: -webkit-linear-gradient(top, #6eb6de, #4a77d4); background-image: -o-linear-gradient(top, #6eb6de, #4a77d4); background-image: linear-gradient(top, #6eb6de, #4a77d4); background-repeat: repeat-x; filter: progid:dximagetransform.microsoft.gradient(startColorstr=#6eb6de, endColorstr=#4a77d4, GradientType=0);  border: 1px solid #3762bc; text-shadow: 1px 1px 1px rgba(0,0,0,0.4); box-shadow: inset 0 1px 0 rgba(255, 255, 255, 0.2), 0 1px 2px rgba(0, 0, 0, 0.5); }
.btn-primary:hover, .btn-primary:active, .btn-primary.active, .btn-primary.disabled, .btn-primary[disabled] { filter: none; background-color: #4a77d4; }
.btn-block { width: 100%; display:block; }

* { -webkit-box-sizing:border-box; -moz-box-sizing:border-box; -ms-box-sizing:border-box; -o-box-sizing:border-box; box-sizing:border-box; }

html { width: 100%; height:100%; overflow y:scroll; }

body {
	width: 100%;
	height:100%;
	font-family: 'Open Sans', sans-serif;
	background: #092756;
	color: #fff;
	font-size: 16px;
	letter-spacing:1.2px;
	background: -moz-radial-gradient(0% 100%, ellipse cover, rgba(104,128,138,.4) 10%,rgba(138,114,76,0) 40%),-moz-linear-gradient(top,  rgba(57,173,219,.25) 0%, rgba(42,60,87,.4) 100%), -moz-linear-gradient(-45deg,  #670d10 0%, #092756 100%);
	background: -webkit-radial-gradient(0% 100%, ellipse cover, rgba(104,128,138,.4) 10%,rgba(138,114,76,0) 40%), -webkit-linear-gradient(top,  rgba(57,173,219,.25) 0%,rgba(42,60,87,.4) 100%), -webkit-linear-gradient(-45deg,  #670d10 0%,#092756 100%);
	background: -o-radial-gradient(0% 100%, ellipse cover, rgba(104,128,138,.4) 10%,rgba(138,114,76,0) 40%), -o-linear-gradient(top,  rgba(57,173,219,.25) 0%,rgba(42,60,87,.4) 100%), -o-linear-gradient(-45deg,  #670d10 0%,#092756 100%);
	background: -ms-radial-gradient(0% 100%, ellipse cover, rgba(104,128,138,.4) 10%,rgba(138,114,76,0) 40%), -ms-linear-gradient(top,  rgba(57,173,219,.25) 0%,rgba(42,60,87,.4) 100%), -ms-linear-gradient(-45deg,  #670d10 0%,#092756 100%);
	background: -webkit-radial-gradient(0% 100%, ellipse cover, rgba(104,128,138,.4) 10%,rgba(138,114,76,0) 40%), linear-gradient(to bottom,  rgba(57,173,219,.25) 0%,rgba(42,60,87,.4) 100%), linear-gradient(135deg,  #670d10 0%,#092756 100%);
	filter: progid:DXImageTransform.Microsoft.gradient( startColorstr='#3E1D6D', endColorstr='#092756',GradientType=1 );

}

div.ex1 {
  overflow-y: scroll;
}

.login {
	position: absolute;
	top: 40%;
	left: 50%;
	margin: -150px 0 0 -150px;
	width:400px;
	height:400px;
}

.login h1 { color: #fff; text-shadow: 0 0 10px rgba(0,0,0,0.3); letter-spacing:1px; text-align:center; }
This is only the cosmetic part of this project. Now, what is that thing that connects these HTML pages with the logic that we have in our minds? The answer is FLASK. So, let’s create our app.py file to connect HTML pages and our logic in python.
app.py
If you check the app.py code, I am using the “sentiment_analysis” module to fetch the trending tweets or the tweets for hashtags or even for predicting sentiments. I am importing this module before. I have written all the logic in this python module.
sentiment_analysis.py
To predict the emotion of a tweet, I have used a pre-built model. I have built a classification Model and saved it and then used that in this file for prediction.
predict_sentiments_model.py
So now, we are all geared up with our html pages, style.css, the flask application, the python logic and our prediction model. We are all set to deploy this model.
Folder Structure:
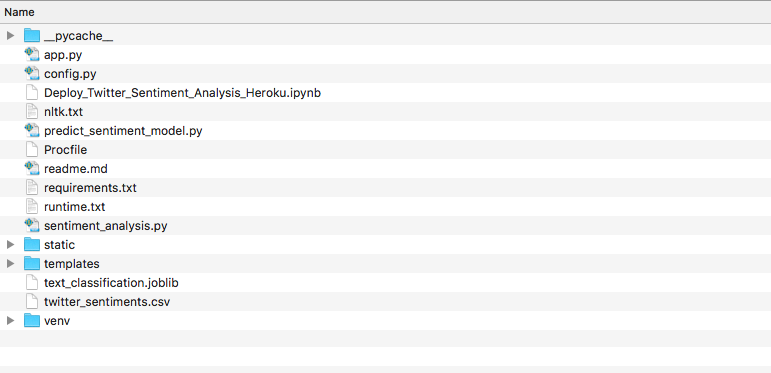
Just check, if your folder structure is accurate! You need all your HTML pages in a folder named “templates“, your stylesheet in “static“.
Now, to deploy it on Heroku, you need to follow the guidelines mentioned in the below post:
Heroku Setup Guide On Mac OSx to Deploy a Python App
Once, your setup is done, try to run your app locally using the below command:
cd /Users/oindrilasen/Desktop/Github/sentiment-analysis-heroku-app
python app.py
Just make sure, it runs just fine locally. Otherwise, it will not run on your Heroku app.
Whilre running the Flask application, if you get an error that the “Address already in use”, please check the solution in my below post:
Flask Error: [Errno 98] Address already in use
To check if all the files are loaded correctly on your Heroku Application, run the below command:
heroku run bash -a twitter-sentiments-analysis
ls
To check the logs while running your app, use the below command:
heroku logs -t
You may get a lot of errors until you have your application up and running. Please use the logs to debug. If you are stuck at some point, let me know! I twill try to help as best as I can.
BTW, my first Heroku application is: Twitter_Sentiments-Analysis
All my code that I have uploaded on my heroku app, is at my GITHUB.
If you find this article any helpful, please clap once.
Thank you for reading and good luck to you!
4