Deep Learning is a topic that I had been avoiding for some time now. Somehow, its potential is intimidating. I always felt that Deep Learning Models are complex and not-so-easy to work with on my Mac OSx. I was worried that I will not be able to fit a Model and then finally see some output. But then, I built a Deep Learning Model to Generate Text or a Story using Keras LSTM with a very little glitch.
Honestly, I was only stuck at the first step while installing Keras and TensorFlow. I work on Jupyter Notebook and I spent a few hours just to write “import Keras” and get it to work. I was on the verge of giving up when I find a solution to install Keras and TensorFlow.
Once I installed and Import Keras, I realized that Keras is precisely what it says – a perfect API that facilitates being able to go from idea to result as fast as possible. So, my understanding is how the algorithm actually works, that’s complex! But to make it work is not complex at all. It is liberating to realize that it is okay to think of an idea and be sure that Keras will have your back!
But again, there is an inquisitive mind that keeps on asking – What is a Neural Network? What is a Recurrent Neural Network? What is LSTM? How Keras is so cool? Right? I definitely need to understand how the API actually works and that is a post for some other day.
So, today, I am going to work on Generating Text or a Story using Keras LSTM. Let’s get started!
DATA
To build a Text Generating Model, we need some text data. A good thing is that now we can download the classics for free and use them in creating generative models. Perhaps the best place to get access to free books that are no longer protected by copyright is Project Gutenberg.
I will use “Pride And Prejudice” By Jane Austen as the Dataset for this project. You can download any book you like and you just need to save it as a text (.txt) file and delete the Gutenberg header and footer embedded in the text. Or, you can download the Dataset that I have used from my Github.
Now, as we have the Data ready to use, we can start our project.
Develop a Text Generating Model using Keras LSTM
We will develop a simple LSTM Network to learn sequences of characters from Pride and Prejudice. Then, we will use this model to generate new sequences of characters.
Import Libraries
First, import all the Libraries required for this project.
 ##Import Keras
 from keras.models import Sequential
 from keras.layers import Dense
 from keras.layers import Dropout
 from keras.layers import LSTM
 from keras.utils import np_utils
 ##Import Other Libraries
 import numpy as np
 import pandas as pd
Load Data
Now, we need to load the text data and convert all the text in lowercase to reduce the vocabulary that the network must learn.
df_text=(open("PrideAndPrejudice.txt").read())
df_text=df_text.lower()
Data Preprocessing
We cannot model the characters directly. So, instead, we will convert the characters to integers. Now, we can do this easily by first creating a set of all of the distinct characters in the book and then creating a map of each character to a unique integer.
characters = sorted(list(set(df_text)))
print(characters)
For example, the list of unique sorted lowercase characters in the book is as follows:

In order to be able to use the textual data with an RNN we will do the below steps:
- Transform the text data to numeric values.
- Create a sequence of characters as our X value and use the following character as our Y value.
- Lastly, transform our data into an array of booleans.
Create Character-Number Mapping
char_to_n = {char:n for n, char in enumerate(characters)
Data Preprocessing
Now, to make the data ready which we can use to train our model, we will split our data up into subsequences with a length of 100 characters. Then we will transform our data into a boolean array.
X = []
Y = []
length = len(df_text)
seq_length = 100
for i in range(0, length-seq_length, 1):
    sequence = df_text[i:i + seq_length]
    label =df_text[i + seq_length]
    X.append([char_to_n[char] for char in sequence])
    Y.append(char_to_n[label])
Now, let’s take a look at the above piece of code.
X: Training array
Y: Target array
seq_length: Length of the sequence of characters that we want to consider before predicting a particular character.
The for loop is used to iterate over the entire length of the text and create such sequences (stored in X) and their true values (stored in Y). At this point, X looks like below:

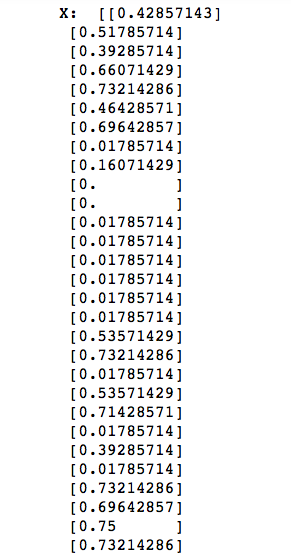
Next, we need to rescale the integers to the range 0-to-1 to make the patterns easier to learn by the LSTM network that uses the sigmoid activation function by default.
X_modified = np.reshape(X, (len(X), seq_length, 1))
X_modified = X_modified / float(len(characters))
Y_modified = np_utils.to_categorical(Y)

print("X: ",X_modified[0])
print("Y: ",Y_modified[0])
Let’s take a look at our Training array which is now ready to be fed into the LSTM model.
And, this is how the target array looks like at this point.

Build a Basic Model
Now, our data is all set! We will use the entire training dataset to learn the probability of each character in a sequence.
We will build a sequential model with two LSTM layers having 200 units each. The first layer needs to be fed in with the input shape. In order for the next LSTM layer to be able to process the same sequences, we enter the return_sequences parameter as True.
Also, dropout layers with a 20% dropout have been added to check for over-fitting. So, the last layer outputs a one-hot encoded vector which gives the character output.
So, let’s first create a very basic Model and take a look at an example.
model = Sequential()
model.add(LSTM(200, input_shape=(X_modified.shape[1], X_modified.shape[2]), return_sequences=True))
model.add(Dropout(0.2))
model.add(LSTM(200))
model.add(Dropout(0.2))
model.add(Dense(Y_modified.shape[1], activation='softmax'))
model.compile(loss='categorical_crossentropy', optimizer='adam')
Fit the Basic Model
This may take some time! For me, it took a few hours to train the basic model.
model.fit(X_modified, Y_modified, epochs=1, batch_size=100)
Save the Model and Load the Model
The model took some time to build. That’s why, its better to save the model and load it while generating some text example.
model.save_weights('/Users/oindrilasen/WORK_AREA/Data Science/Projects/LSTM_Text_Generator/models/text_generator_basic_model.h5')

model.load_weights('/Users/oindrilasen/WORK_AREA/Data Science/Projects/LSTM_Text_Generator/models/text_generator_basic_model.h5')
Generate Text
Finally, it is time to see some results!
We will check for a random row from our X array that is an array of 100 characters. After this, we target predicting another 100 characters following X.
Now, while preparing the mapping of unique characters to integers, we must also create a reverse mapping that we can use to convert the integers back to characters so that we can understand the predictions.
n_to_char = dict((i, c) for i, c in enumerate(characters))
The input is reshaped and scaled as previously and the next character with maximum probability is predicted.
string_mapped = X[0]
full_string = [n_to_char[value] for value in string_mapped]
full_string
##generating characters
for i in range(400):
     x = np.reshape(string_mapped,(1,len(string_mapped), 1))
     x = x / float(len(characters))
     pred_index = np.argmax(model.predict(x, verbose=0))
     seq = [n_to_char[value] for value in string_mapped]
     full_string.append(n_to_char[pred_index])
     string_mapped.append(pred_index)
     string_mapped = string_mapped[1:len(string_mapped)]
seq is used to store the decoded format of the string that has been predicted till now. Next, the new string is updated, such that the first character is removed and the new predicted character is included.
Results
Okay, I must admit, I was expecting a remarkably better output. But the basic model did a very humiliating job here.
Let’s take a look at the text that Jane Austen wrote:
print(df_text[:200])
chapter 1
it is a truth universally acknowledged, that a single man in possession of a good fortune, must be in want of a wife. however little known the feelings or views of such a
Pride and Prejudice – Jane Austen
Now, let’s take a look at what our text generator wrote:
 txt=""
 for char in full_string:
     txt = txt+char
 txt
chapter 1
it is a truth universally acknowledged, that a single man in
possession of a lere the sase the sase the sase the sas to the
she sooe the sase the sase the sase the sase the sas to the
pere the sas to the sase the sase the sase the sase the was
“i sas to the sase the sase the sase the sase the sas to the\n
pere the sas to the sase the sase the sase the sase the was
“i sas to the sase the sase the sase the sase the sas to the\n
pere the sas
Honestly, I have no idea what language it is. Let’s check one for more time for a random seed.
##Load LSTM network and generate text
 import sys
 ##pick a random seed
 start = np.random.randint(0, len(X)-1)
 print(start)
 pattern = X[start]
 n_vocab = len(characters)
 print("Seed:")
 print( "\"", ''.join([n_to_char[value] for value in pattern]), "\"")
 ##generate characters
 for i in range(1000):
     x = np.reshape(pattern, (1, len(pattern), 1))
     x = x / float(n_vocab)
     prediction = model.predict(x, verbose=0)
     index = np.argmax(prediction)
     result = n_to_char[index]
     seq_in = [n_to_char[value] for value in pattern]
     sys.stdout.write(result)
     pattern.append(index)
     pattern = pattern[1:len(pattern)]
     print ("\nDone")
Not at all impressive, right? Okay, I need a deeper/wider/larger model! How about an enormous model?
An Enormous Model to generate text using Keras LSTM
When I started running this model, I realized I really need a new machine. It showed me an ETA of 60 Hours! So, I will update the marvelous creation by my text generator 60 hours later, provided the program actually ends.
Thank You for reading!
3